Dear James: I have to replace my old, tarnished brass kitchen faucet. What are the basic steps to installing one, and are there any new types of brass faucets that won't tarnish? — Karen F.
Dear Karen: There is a brass fixture finishing technology that protects the brass so it will not tarnish. The brass body of the fixture is coated with a thin coat of a special brass alloy in a vacuum chamber. The finish not only never tarnishes, but it is also extremely durable.
It is not difficult to replace a faucet yourself, so there is no need to call a plumber; however, most faucets will require you to use a basin wrench. This is a unique-looking tool with a swivel head that easily accommodates the tight space constraints that come with working underneath a kitchen sink. Most tool rental shops have them.
Space under a kitchen sink, especially one with a garbage disposal, is very limited, so it is easier for a smaller person with tiny hands to install a faucet. Although you need some muscles to install a new faucet, make sure you aren't acting like Arnold! The fittings and connections should only be tightened enough to eliminate leaks.
To begin the new faucet installation, turn off the hot and cold water shutoff valves under your sink. Try running the water to make certain it is really off. If you have older plumbing, the shutoff valves may not always shut the water flow off completely. If you start to remove the fittings or cut the tubing and the water is not totally off, you will be able to swim in your kitchen before you know it.
Be sure to read the installation instructions that came with your new faucet. Even if you have installed one before, read the instructions, since faucets are all designed differently. There is a large variety of supply tube fittings, so familiarize yourself with the parts before you crawl under the sink.
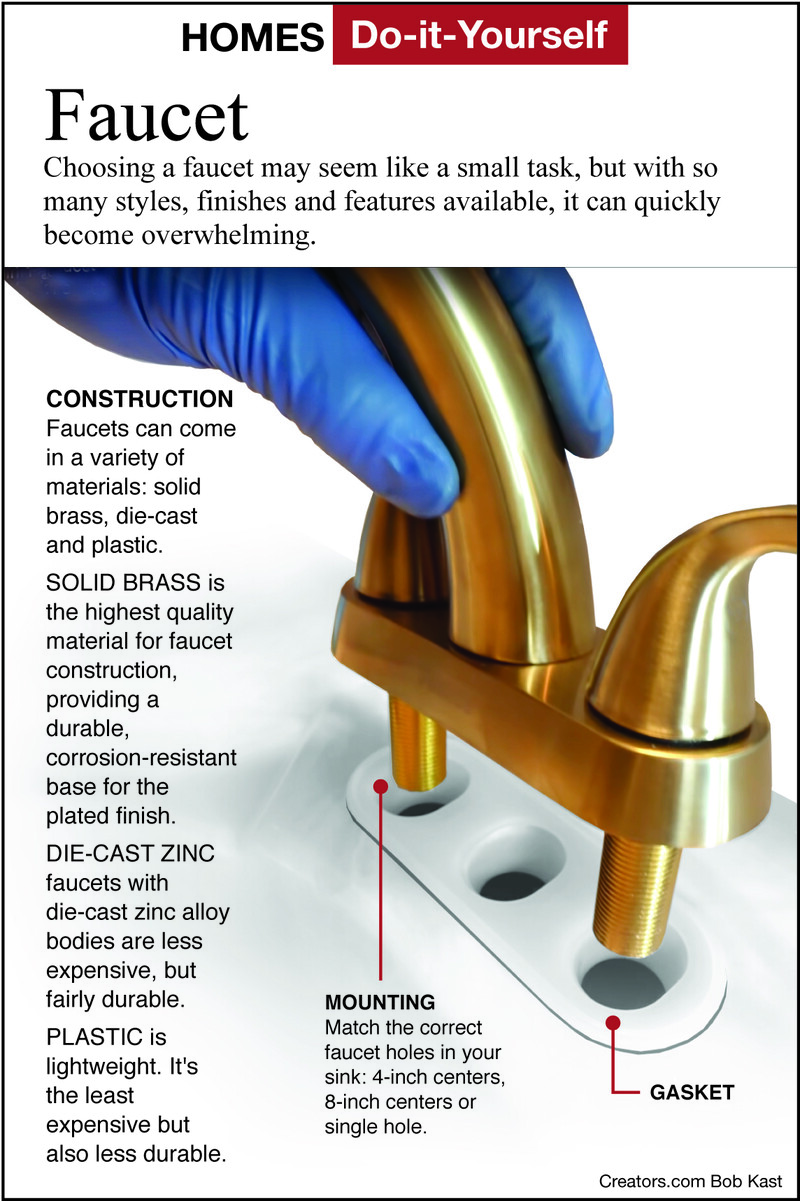
Once you have done your studying, loosen the supply lines and the faucet bolts and then remove the old faucet. Next, clean the sink's surface area. If your faucet kit included a gasket, place it between the new faucet and the sink. If there was no gasket included, you will need to lay down some plumber's putty on the sink. Just roll a small bead that will block water leakage from the sink surface into your cabinets.
Once you have the faucet tightened in place, install the supply tube from the shutoff valves to it. The tubes are usually made of flexible plastic or easy-to-bend metal. They are offered in a variety of lengths and fitting designs depending on your faucet design.
The most important part of installing a faucet without leaks is to make sure you install it square at the tube compression fittings. They are flexible, so bend them to ensure no leaking will occur. If they meet the fittings at an angle, they are not securely installed.
Finally, snug down the compression fittings and take out the aerator so it does not get clogged. Turn on the water slowly and check for leaks. If there are leaks, gradually snug down the fittings a little more until they stop.







View Comments